Yeti Microphone Pattern Settings
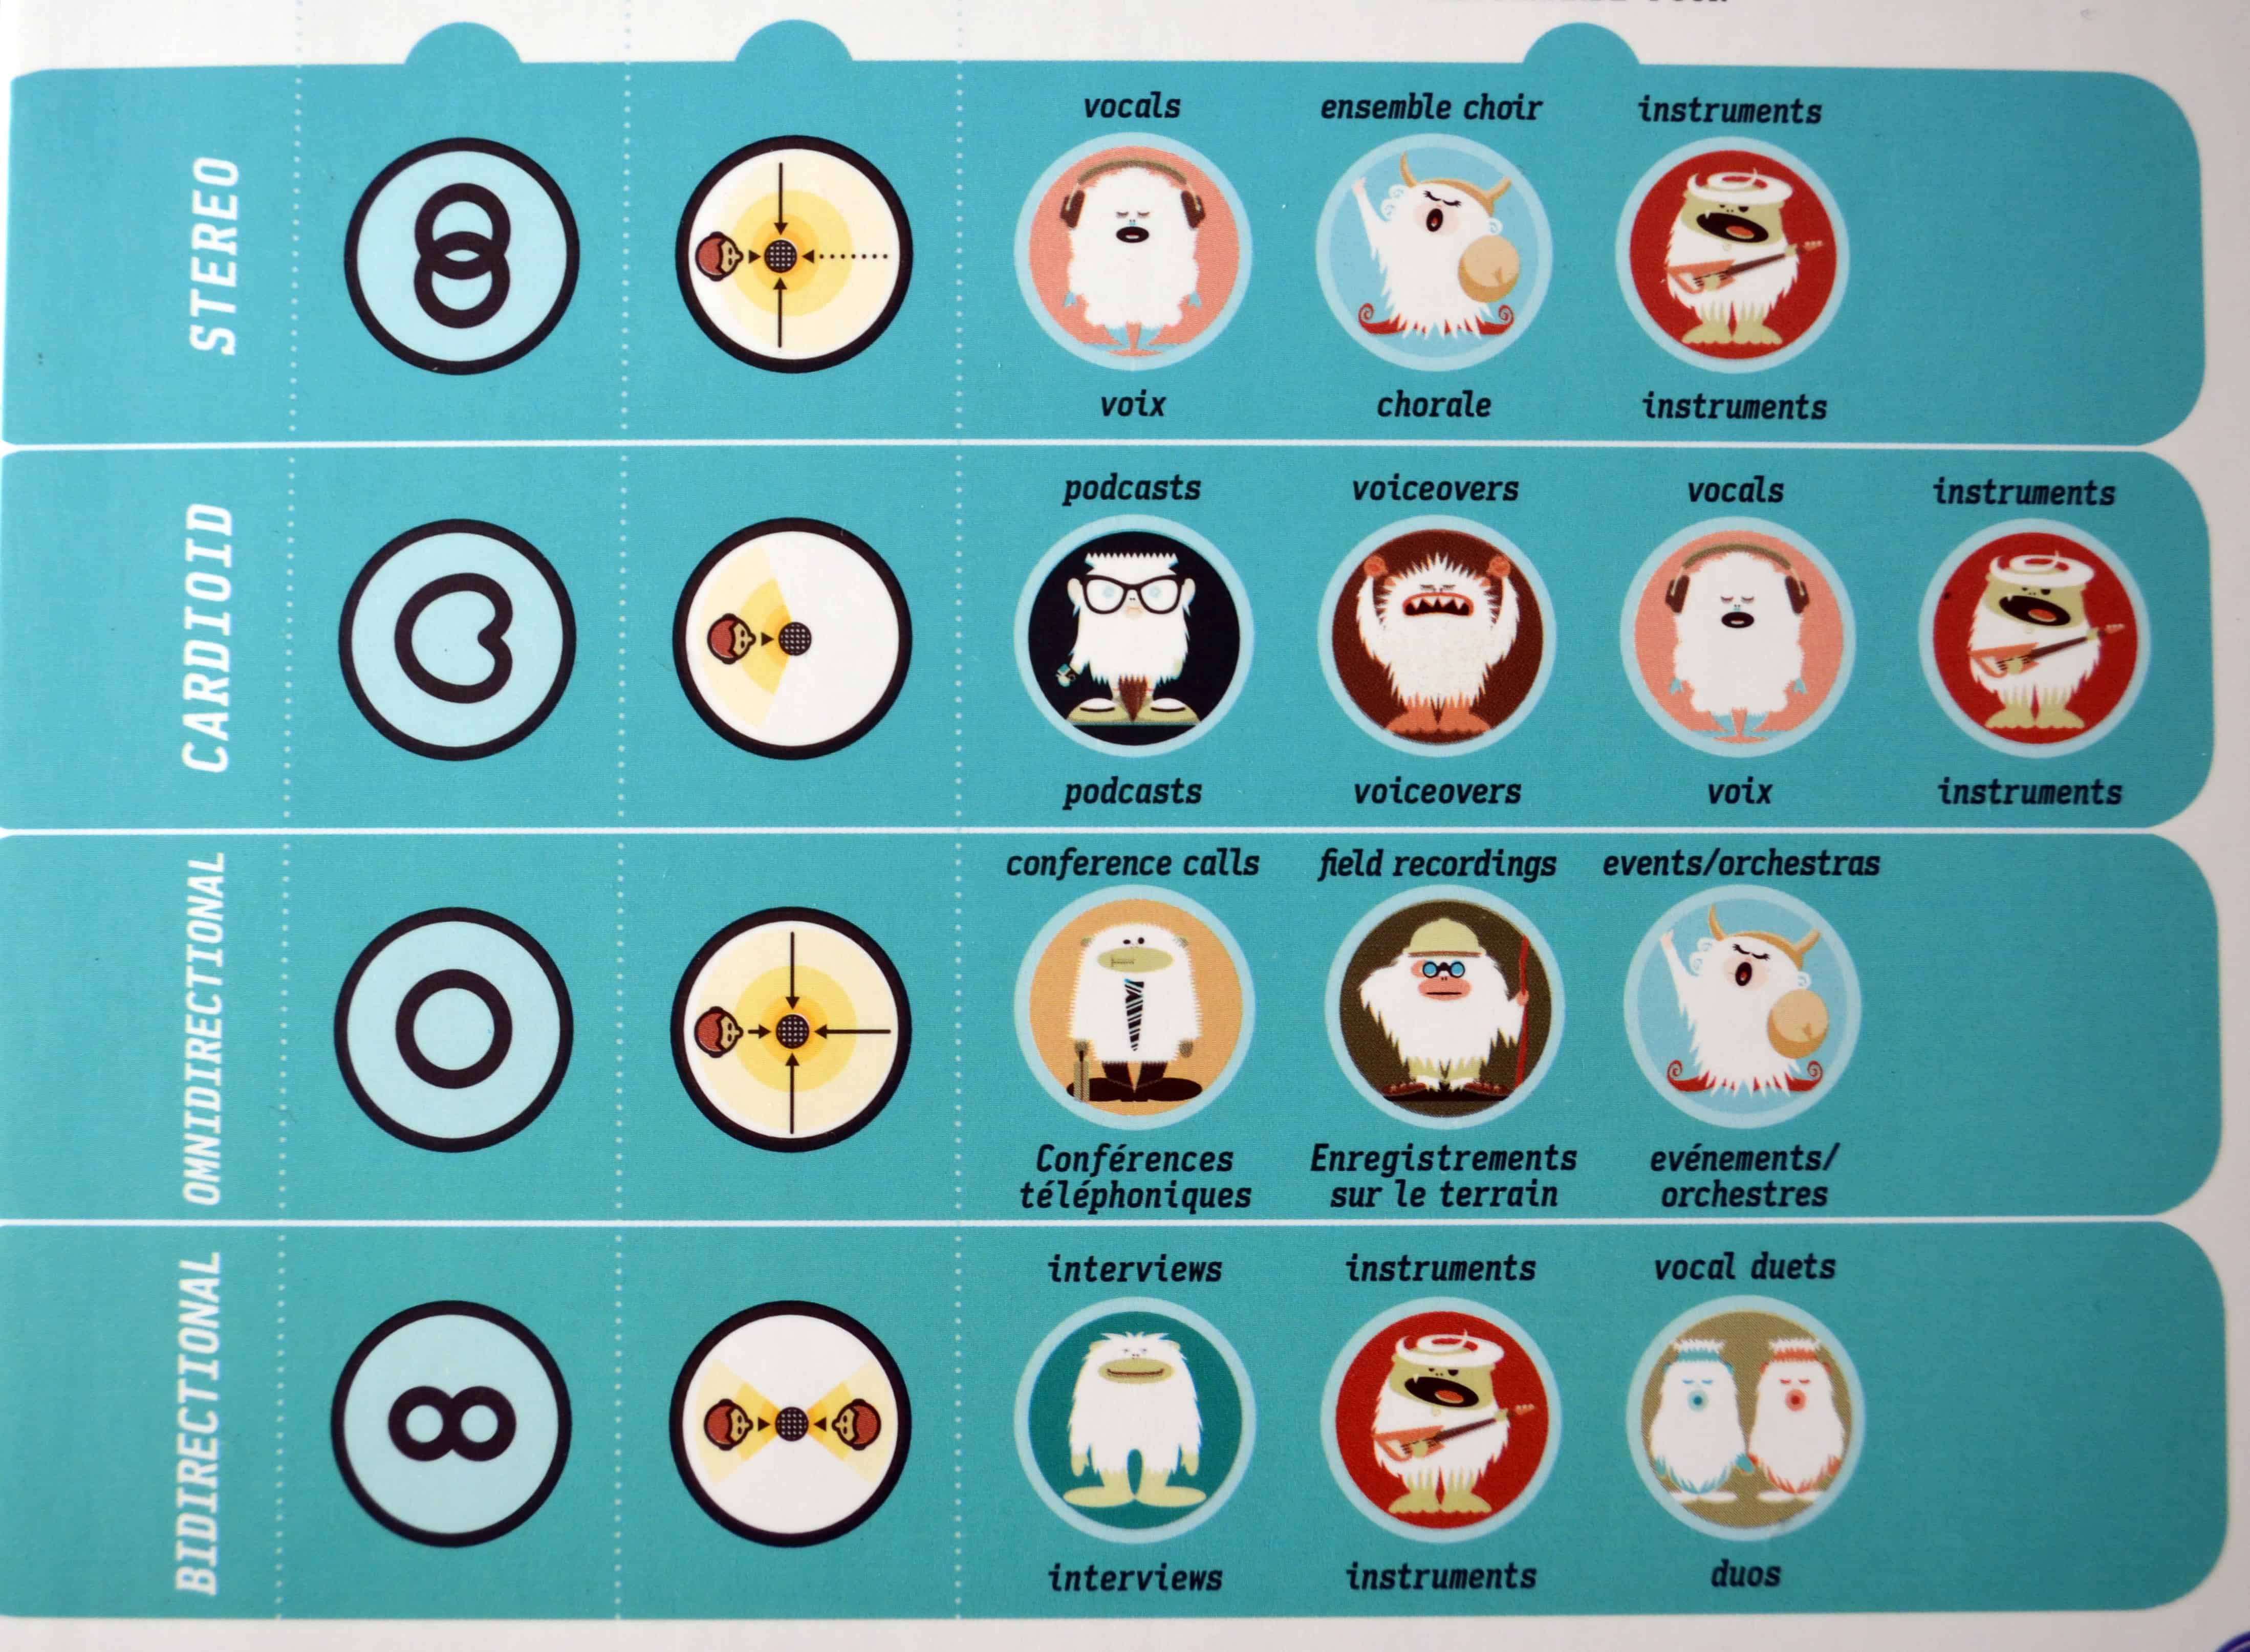
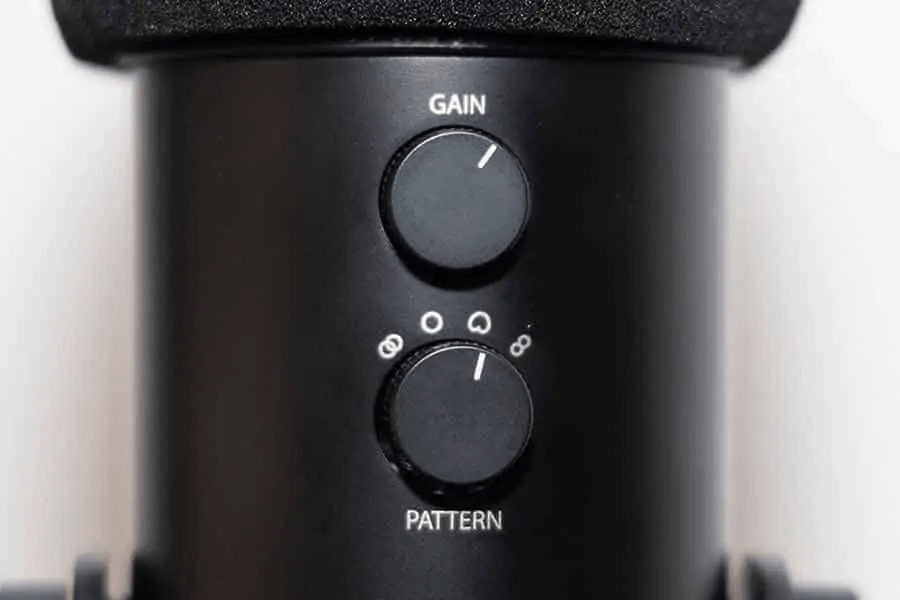
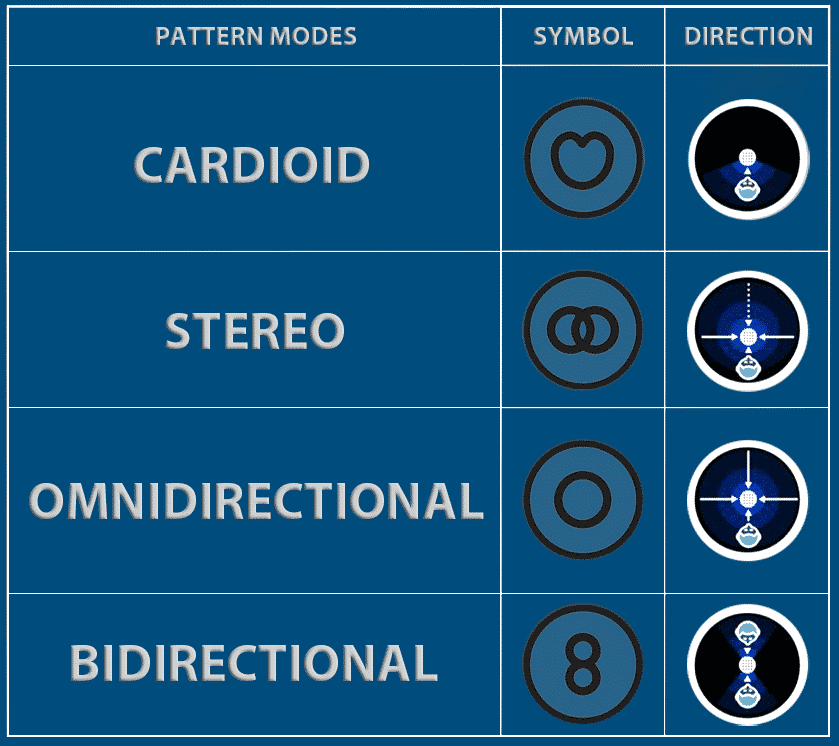
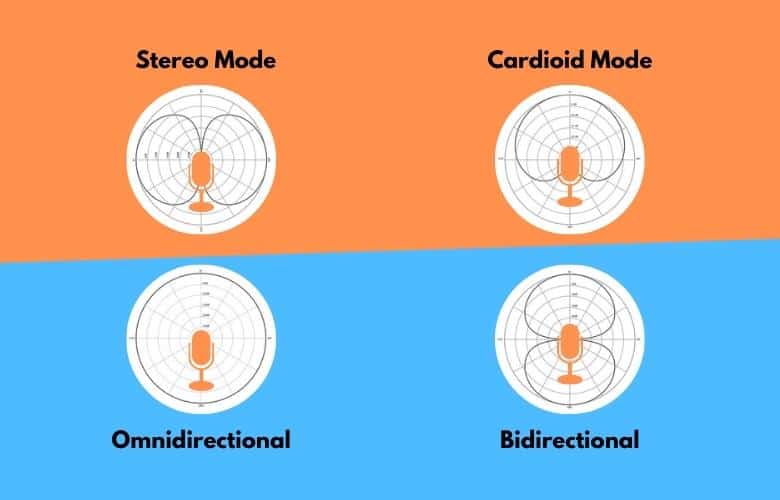
Yeti Microphone Pattern Settings - Web use a pop filter or mic foam. When you get into the properties of your blue yeti microphone, configure the following settings: Place the mic about 10 in (25.4 cm) away from your mouth. This means you have to configure it properly to pick up an acceptable amount of noise. It helps prevent distortion and clipping in situations where the input level is naturally high. Use a shock mount / boom arm. Web zero gain or low gain: Most microphones either come with an omnidirectional or cardioid polar pattern but blue yeti offers multiple polar patterns, allowing the users to switch between them according to requirements. Web here’s what you’ll learn: One of the biggest pros of the blue yeti can also be one of its biggest cons, depending on how it best suits your needs. Web the yeti microphone settings for picking up sound include four patterns that can be interchanged. Each pattern serves a specific purpose, allowing you to tailor your microphone’s. Which yeti mode is the best? Choose the appropriate pickup pattern. Web the blue yeti’s settings should be adjusted for the specific recording environment. Use a shock mount / boom arm. When it comes down to it, this setting blocks out any unwanted sound. It helps prevent distortion and clipping in situations where the input level is naturally high. This is ideal for recording loud sound sources or when the microphone is close to the audio source. Second, they ignore the gain setting. Web the yeti microphone settings for picking up sound include four patterns that can be interchanged. Web zero gain or low gain: Setting the gain to zero or at its lowest level reduces the microphone’s sensitivity. Most microphones either come with an omnidirectional or cardioid polar pattern but blue yeti offers multiple polar patterns, allowing the users to switch between. Setting up the blue yeti. Web the four polar pattern settings available in the blue yeti microphone are cardioid, stereo, omnidirectional, and bidirectional. Web set the microphone on cardioid mode. Setting the gain to zero or at its lowest level reduces the microphone’s sensitivity. The yeti has 4 different polar pattern options. Use a shock mount / boom arm. Web here’s what you’ll learn: The graph shows the symbols representing each yeti mic mode, their purpose, and how the sound is picked up. This means you have to configure it properly to pick up an acceptable amount of noise. There are four different pickup patterns on the blue yeti mic. One of the biggest pros of the blue yeti can also be one of its biggest cons, depending on how it best suits your needs. This means you have to configure it properly to pick up an acceptable amount of noise. Web zero gain or low gain: Each blue yeti pattern changes the microphone’s direction of maximum sensitivity and the. One of the biggest pros of the blue yeti can also be one of its biggest cons, depending on how it best suits your needs. As a condenser microphone, the blue yeti has a frequency response of 20hz to 20khz, which is sensitive enough to pick up even the faintest sound in the surroundings. This blog post and video guide. The indicator will be vertical if gain is centered. Check the settings in your recording software / daw. When you get into the properties of your blue yeti microphone, configure the following settings: Web the yeti microphone settings for picking up sound include four patterns that can be interchanged. Web the blue yeti’s settings should be adjusted for the specific. The indicator will be vertical if gain is centered. This means you have to configure it properly to pick up an acceptable amount of noise. Set a suitable gain level. Web zero gain or low gain: Web but don’t worry, you can transform your blue yeti audio from lousy to legendary by changing your blue yeti settings. Web in this video i show you the blue yeti pickup patterns that your microphone can be set to in order to achieve the ideal recording setup for your podcast. The yeti has 4 different polar pattern options. Let’s take a look at what each mode does so that you have a better understanding of what the blue yeti mic. The polar pattern is the area on the microphone that is sensitive to audio signals. Drop that gain down low. Web so, to access these settings you need to go to start → change system sounds → recording → blue yeti mic → properties. Web use a pop filter or mic foam. Use a shock mount / boom arm. Use a shock mount / boom arm. Place the mic about 10 in (25.4 cm) away from your mouth. Check the settings in your recording software / daw. Web set the microphone on cardioid mode. Web the yeti microphone settings for picking up sound include four patterns that can be interchanged. The blue yeti’s 4 modes and adjusting the gain settings. Let’s take a look at what each mode does so that you have a better understanding of what the blue yeti mic is capable of. Choose the appropriate pickup pattern. Cardioid, stereo, bidirectional, and omnidirectional. Reduce the gain to low without muting the microphone completely. The graph shows the symbols representing each yeti mic mode, their purpose, and how the sound is picked up. Check the settings in your recording software / daw. Web the four blue yeti microphone patterns or modes are bidirectional, cardioid, omnidirectional, and stereo. The indicator will be vertical if gain is centered. The optimal setting for your blue yeti microphone to get better sound quality. Everything you need to know to get clear audio for your blue yeti microphone. Web the four polar pattern settings available in the blue yeti microphone are cardioid, stereo, omnidirectional, and bidirectional. Each pattern serves a specific purpose, allowing you to tailor your microphone’s. Web the four polar patterns (or modes) offered by the blue yeti microphone are: Set a suitable gain level. The gain setting controls how sensitive the microphone is, and if it’s set too high, it can cause problems with feedback and noise.
Blue Yeti Microphone Vintage White Ultimate Edition UnBoxing & Review
![Best Settings For Blue Yeti Microphone [Expert Guide]](https://www.becomesingers.com/wp-content/uploads/2020/10/Blue-Yeti-Pattern-Settings.png)
Best Settings For Blue Yeti Microphone [Expert Guide]

Blue Yeti Tutorial How To Use The Blue Yeti Microphone To Get Clear
Blue Microphones Yeti Review
Blue Yeti How To Use Your Microphone Record Settings 90 Second
All About Blue Yeti Mic Pattern Settings Hollyland
All About Blue Yeti Mic Pattern Settings Hollyland
Blue Yeti Microphone How To Set Up Dubois Knowell

HOW TO OPERATE BLUE YETI MICROPHONE PATTERN FUNCTIONS MOIN UDDIN SHOW
Best Settings For Blue Yeti Microphone Guide)
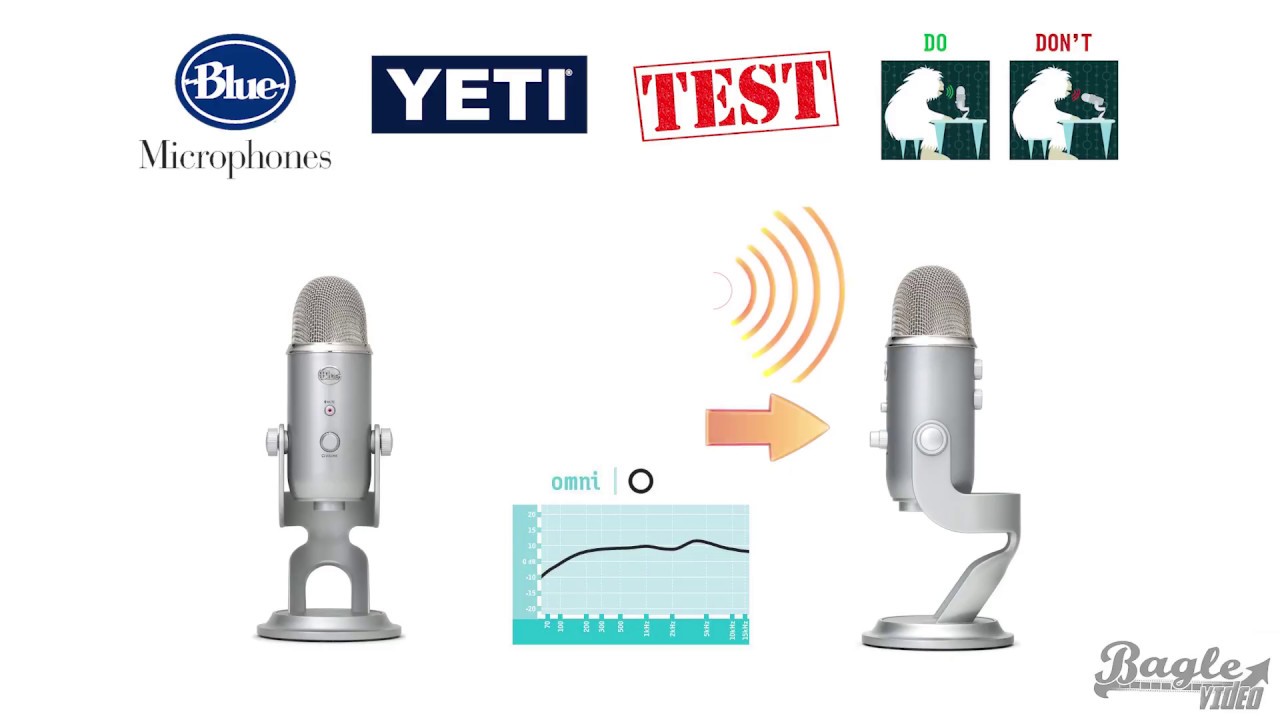
As A Condenser Microphone, The Blue Yeti Has A Frequency Response Of 20Hz To 20Khz, Which Is Sensitive Enough To Pick Up Even The Faintest Sound In The Surroundings.
The Blue Yeti Offers Four Recording Patterns:
Web Best Blue Yeti Settings.
Which Yeti Mode Is The Best?
Related Post: